
Embarking on a Journey: DIY Damascus Steel Knife Making Tips
Crafting your own Damascus steel knife is a journey that combines artistry, precision, and passion. The process might seem daunting, but with the right guidance and a dose of creativity, you can create a blade that's not only functional but also a work of art. Here are some essential tips to guide you on your DIY Damascus steel knife-making adventure:
1. Research and Gather Materials: Start by delving into the world of Damascus steel. Understand its history, composition, and the various techniques used to create those mesmerizing patterns. Research the types of steel that can be used and gather all the necessary materials, including high-carbon and low-carbon steel, flux, and tools like a forge, hammer, anvil, and tongs.
2. Safety First: Working with hot metal requires utmost care. Wear appropriate safety gear, including gloves, safety glasses, and protective clothing. Ensure you're working in a well-ventilated space to prevent inhaling harmful fumes.
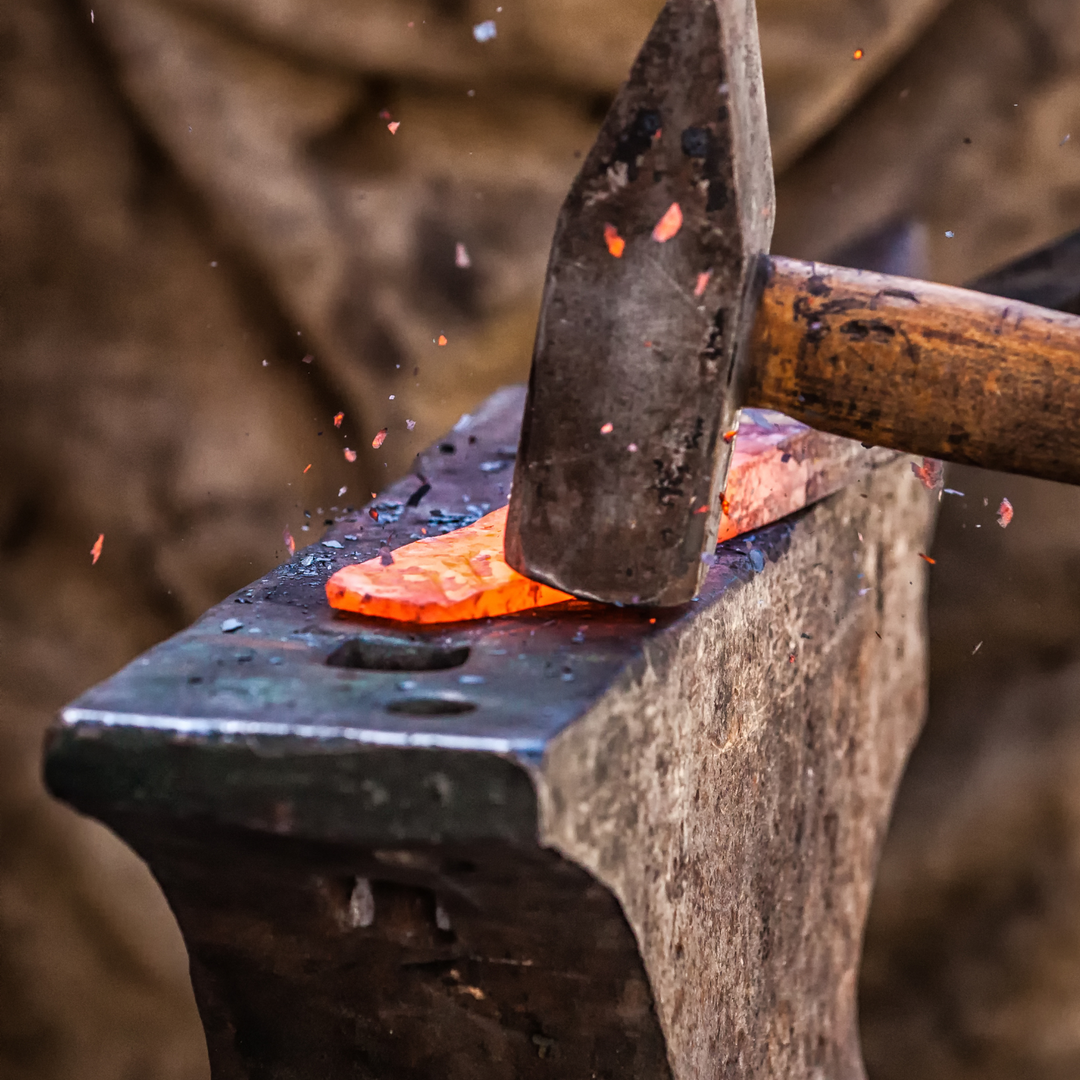
3. The Forge: Setting up a forge is essential for heating and shaping the steel. You can choose between gas or coal forges. Maintain a consistent temperature to ensure proper forging. This is where the magic begins as you heat, shape, and fold the steel layers.
4. Layering and Folding: Damascus steel's distinct patterns come from the layering and folding process. Alternate between high-carbon and low-carbon steel layers, then forge-weld and fold the stack. Repeat this process multiple times to create the desired pattern and blend the metals.
5. Hammer Time: Forging is a meticulous art. Use a hammer to shape and flatten the folded stack. This not only ensures a uniform blade but also eliminates air pockets and impurities between the layers.
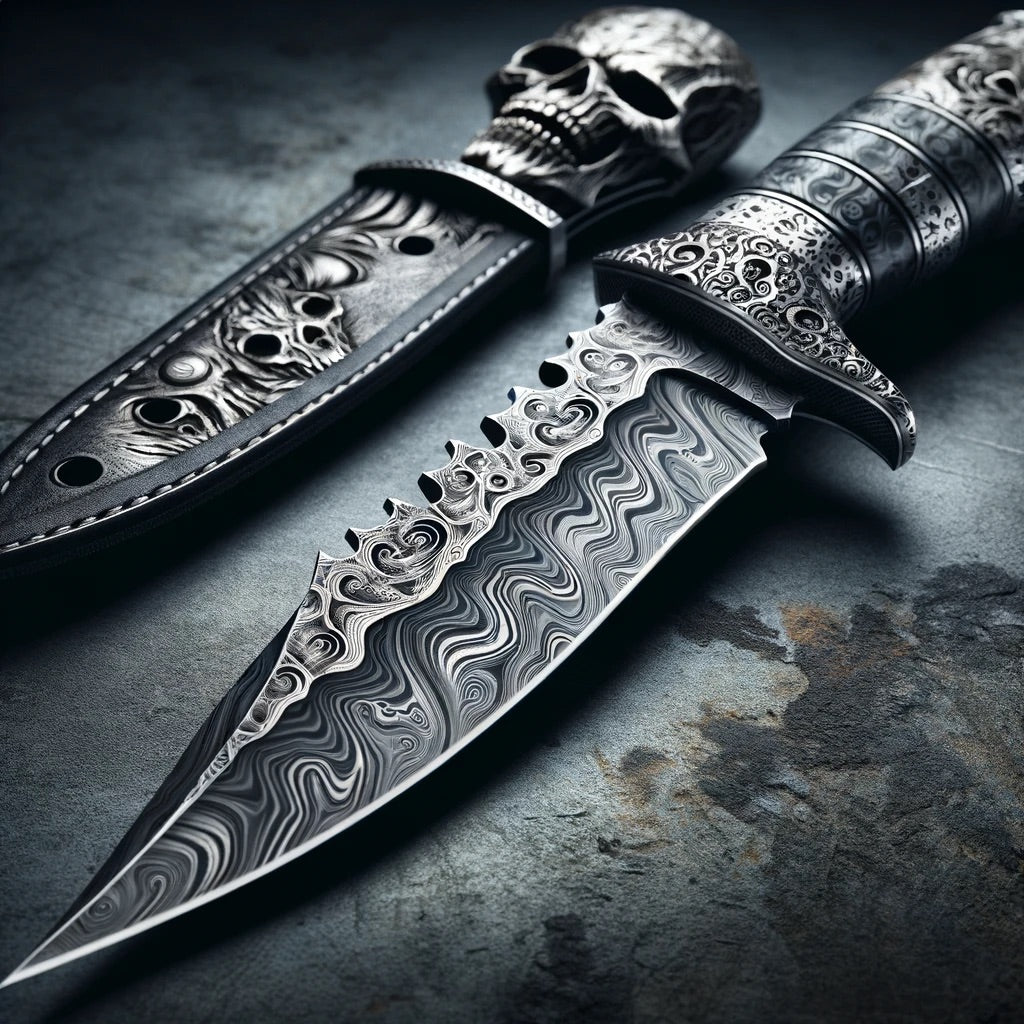
6. Etching and Reveal: Once the blade is forged to your satisfaction, it's time to reveal the Damascus pattern. Coat the blade with an acid solution to etch away the high-carbon steel and unveil the intricate layers. This step brings the blade's design to life.
7. Heat Treatment: Achieving the right balance between hardness and flexibility is crucial. Heat treat the blade by heating it to a critical temperature and quenching it rapidly in oil or water. This imparts strength and edge retention to your knife.
8. Grinding and Polishing: Shape your blade and refine its profile through grinding. Pay attention to the bevels, edge, and spine. Polish the blade to a mirror-like finish, highlighting the Damascus pattern and revealing its true beauty.
9. Handle and Assembly: Choose a handle material that complements the elegance of your Damascus blade. Wood, bone, and micarta are popular options. Craft the handle and attach it securely to the tang. Ensure a balanced feel and ergonomic grip.
10. Sharpening and Testing: Sharpen your Damascus steel blade to razor-sharpness. Test its edge retention and performance on various materials. Make any necessary adjustments to ensure your knife meets your expectations.
11. Patience and Persistence: Knife making is an art that demands patience and practice. Embrace the learning curve and don't be discouraged by setbacks. Each blade you craft is an opportunity to refine your skills.
12. Showcase Your Art: Once your DIY Damascus steel knife is complete, showcase it proudly. Share your creation with fellow knife enthusiasts, gather feedback, and continue honing your craft.
Embarking on the journey of DIY Damascus steel knife making is a rewarding experience. It's a blend of traditional craftsmanship and your unique artistic touch. With each strike of the hammer and every fold of the steel, you're not just making a knife – you're crafting a piece of history, passion, and dedication that will stand the test of time.

Leave a comment